Draw
file |
PDF
page |
colour |
parts provided |
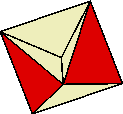
| Base+A1 |
2 |
cream |
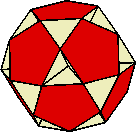
the petals of the Tetrahemihexahedron (A) plus
the cream triangles of the pentagonal cupola base |
| Base+A2 |
3 |
red |
the outer triangles of the Tetrahemihexahedron (A) plus
the red parts of the pentagonal cupola base |
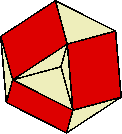
| PetalsB+C |
4 |
cream |
the petals of the Octahemioctahedron (B) and the
Cubohemioctahedron (C) (you need two of these) |
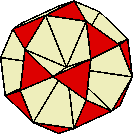
| PetalsD+E |
5 |
cream |
the petals of the Small icosihemidodecahedron (D) and the
Small dodecahemidodecahedron (E) (you need two of these) |
| OuterBCDE |
6 |
red |
the outer parts of the models:
B (8 large triangles)
C (6 squares)
D (20 small triangles)
E (12 pentagons) |
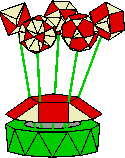
| StandB |
7 |
green |
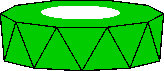
the bottom of the stand (half a decagonal antiprism)
with half the sides |
| StandT |
8 |
green |
the top of the stand with the other half of the sides
(half a decagonal antiprism with a big hole in it) |